IWISTAO Blog is the official platform of IWISTAO HIFI MINIMART, dedicated to high-fidelity audio and DIY electronics. We focus on tube amplifiers, output and power transformers, speaker enclosures, and Bluetooth audio technologies, including HiFi Bluetooth speakers, headphones, and tube-based acoustic systems. The blog shares product insights, technical knowledge, and practical guides for audiophiles and audio builders worldwide.
Deep Bass in Small Spaces: A Bookshelf Transmission Line Project
Published by IWISTAO
In the world of DIY audio, some pairings feel like destiny. The purity of a single full-range driver, free from the complexities of a crossover, is one such siren call. The other is the transmission line (TL) enclosure, an "acoustic labyrinth" promising bass that is deep, articulate, and devoid of the common boominess of ported boxes. But what happens when you try to merge these two ideals into a compact, bookshelf-friendly form factor? This is where the real magic—and the real challenge—begins. We're embarking on a journey to design a bookshelf TL speaker around a common full-range driver with a resonant frequency (Fs) of 55 Hz. It's a quest to defy physics and coax profound bass from a small space.
There is an example for a bookshelf transmission line speaker as below.
The Dream Team: Full-Range Drivers and Transmission Lines
For many audiophiles, the combination of a full-range driver in a transmission line enclosure is the pursuit of an ideal. A single driver handles the entire frequency spectrum, eliminating the phase shifts and sonic discontinuities that can be introduced by crossover networks. The result is often described as a remarkably coherent and life-like soundstage. The transmission line complements this by tackling the most significant challenge for any small driver: low-frequency reproduction. Instead of simply trapping or crudely venting the driver's rear sound wave, a TL guides it down a long, damped path. As one source puts it, the goal is to take this back wave, invert its phase, and use it to reinforce the front wave, extending the bass response cleanly and powerfully .
The 55 Hz Conundrum: Quarter-Wavelength vs. The Bookshelf
Here's where our 55 Hz driver throws down the gauntlet. The foundational principle of a classic transmission line is the "quarter-wavelength rule." To get the exiting back wave in phase with the front wave at the driver's resonant frequency, the line's length should be one-quarter of that frequency's wavelength. Let's do the math.
The speed of sound in air is approximately 344 meters per second. The wavelength (λ) for our 55 Hz target is 344 m/s ÷ 55 Hz, which equals about 6.25 meters. A quarter of that is roughly 1.56 meters (about 5.1 feet). Now, the problem is obvious: how do you fit a five-foot-long pipe inside a box that can reasonably be called a "bookshelf" speaker? The answer lies in clever acoustic engineering: folding the line intricately within the cabinet, like a maze, and the strategic use of damping material.
Taming the Labyrinth: The Art and Science of Damping
An empty, folded pipe would be an acoustic disaster, creating a series of unwanted resonances, or "pipe organ" effects, that would ruin the sound. This is where damping material—the "soul" of the design—comes in. Stuffing the line with materials like long-fibre wool, polyester batting (Poly-fil), or acoustic foam serves two critical purposes.
First, it acts as a low-pass filter, absorbing the upper-bass and midrange frequencies of the back wave. This ensures that only the very lowest frequencies, which are less affected by the damping, emerge from the line's terminus, preventing coloration and smearing of the stereo image.
Second, and crucially for our bookshelf design, the damping material effectively slows the speed of sound within the line. This acoustic trick means a physically shorter line can be tuned to a lower frequency. The exact amount and density of stuffing is a delicate balancing act; too little and you get resonances, too much and you choke the bass output entirely. This is why TL design has historically been a process of painstaking trial and error, as noted by many DIY builders on forums like diyAudio.
From Blueprint to Box: Practical Design Choices
With the core principles in mind, let's move from theory to the practicalities of the build.
The Heart of the Matter: Choosing the Right Driver
Our starting point is a driver with an Fs of 55 Hz. But other Thiele-Small (T/S) parameters are just as important. For transmission lines, drivers with a low total quality factor Qts), typically below 0.4 or 0.5, are often preferred as they have better internal damping and control. A driver like the Tang Band W5-2143, with an Fs of 55 Hz and a Qts of 0.38, is an excellent real-world candidate for this project . The driver must also have a rigid cone to handle the air load of the long line without deforming.
Shaping the Sound: Line Geometry and Tapering
The shape of the line itself is a key design variable. While a constant cross-section line is simplest, many modern designs employ a tapered line that narrows from the driver towards the port. This tapering can help to suppress higher-order harmonics and smooth the overall frequency response. The initial cross-sectional area of the line is typically chosen to be between one to three times the driver's cone area (Sd), providing a good starting point for simulations.
The Exit Strategy: The Port and MLTLs
In its purest form, the end of the transmission line is simply an open terminus. However, a popular and highly effective variation is the Mass-Loaded Transmission Line (MLTL). As described by resources like Neurochrome, an MLTL is essentially a quarter-wave enclosure that also incorporates a tuned port. This hybrid design blurs the line between a pure TL and a bass-reflex box, allowing the port to act as a resonator to further shape and extend the low-frequency output, offering another layer of tuning flexibility.
The Modern DIY Advantage: Simulation Before Sawdust
For decades, designing a successful TL was a dark art. Pioneers like Perry Marshall, who derived his own mathematical models in the 1990s out of frustration with the lack of tools, highlight the historical difficulty . Today, the landscape has been transformed by powerful and accessible software.
The work of pioneers like Martin J. King, whose MathCad worksheets became a foundational resource for the DIY community, demystified the process . More recently, software like SpicyTL, which runs on the free LTspice circuit simulator, has provided an even more modular and intuitive way to model complex TL geometries, including tapering and damping effects . These tools allow you to simulate the entire system—driver, enclosure, and stuffing—and predict the frequency response with remarkable accuracy, turning what was once guesswork into a repeatable engineering process.
Conclusion: A Sound That Breathes
Designing a bookshelf transmission line speaker around a 55 Hz full-range driver is an ambitious project, but it is far from impossible. It represents a fascinating intersection of acoustic theory, clever packaging, and artistic tuning. By leveraging modern simulation tools to navigate the complexities of line length, folding, and damping, today's DIY builder can overcome the physical constraints of a small enclosure.
The reward for this effort is not just a speaker, but an experience. It's the satisfaction of creating a compact system that delivers a low-frequency performance of remarkable depth, clarity, and texture—a sound that, as its most ardent fans would say, doesn't just rumble, but truly breathes.
From Specs to Sound: A DIY Guide to Designing the Perfect Sealed Speaker Enclosure
From Specs to Sound: A DIY Guide to Designing the Perfect Sealed Speaker Enclosure
Introduction: The Science and Soul of Speaker Building
There is a unique and profound satisfaction that comes from creating something with your own hands, especially when that creation can fill a room with breathtaking sound. For the DIY audio enthusiast, building a custom speaker is not just a technical project; it's a journey into the heart of audio reproduction. It transforms you from a passive listener into an active creator of your own sonic experience. The sealed enclosure, often called a closed box or acoustic suspension design, stands as the perfect gateway into this rewarding world. Its elegant simplicity belies a sophisticated acoustic principle, making it an ideal and educational first project.
The fundamental purpose of any speaker enclosure is twofold. First, it must provide a stable, non-resonant housing for the speaker driver. On a basic level, the enclosure keeps all the components in one unit and holds the drivers in the correct position to work together effectively. Second, and more critically, it must solve a fundamental problem of physics known as the "acoustic short circuit." A speaker driver creates sound by moving a diaphragm back and forth. As it moves forward, it creates a positive pressure wave (sound); as it moves backward, it creates a negative pressure wave. The radiation from the rear side is in antiphase with the front side radiation. At low frequencies, where the sound waves are very long, these two opposing waves wrap around the driver and cancel each other out. The result is a dramatic attenuation of bass. The enclosure's primary job is to block this rear wave, separating it from the front wave and allowing low frequencies to propagate properly.
Why Sealed Enclosures?
Among the various types of enclosures—ported, bandpass, transmission line—the sealed design is celebrated for a distinct set of characteristics that make it highly desirable, particularly for audiophiles who prioritize accuracy and detail.
Excellent Transient Response: This is the hallmark of a sealed enclosure. "Transient response" refers to a speaker's ability to start and stop moving precisely with the musical signal. Sealed boxes are known for delivering improved transient response, which translates to bass that is often described as "tight," "accurate," and "controlled". The air trapped inside the airtight box acts like a spring or a shock absorber, helping to damp the driver's movement and prevent it from overshooting or ringing after a note has ended. This makes them ideal for reproducing the sharp attack of a kick drum or the intricate texture of a bass guitar.
Simple Design and Construction: Compared to ported or bandpass designs, which require precise calculation of port dimensions and tuning frequencies, the sealed enclosure is refreshingly straightforward. The difficulty of construction is very easy; you just have to make sure the box doesn’t leak air. The primary variable you need to calculate is the internal volume, making it a much more forgiving project for beginners.
However, this performance comes with a well-understood trade-off: lower efficiency. The air spring that provides such excellent control also resists the driver's movement, meaning it requires more amplifier power to produce the same sound pressure level (SPL) as a comparable ported design. Ported enclosures are generally more efficient and allow you to use a smaller amplifier than you would need with a sealed enclosure. A sealed box will sound tight and deep, but not as loud unless you are feeding it significant power.
This guide is built on a clear premise: by understanding a few key technical specifications, you can move beyond guesswork and methodically design a sealed speaker enclosure that is acoustically optimized for your chosen driver. We will walk through a step-by-step process, transforming a list of numbers—the Thiele/Small parameters—into a blueprint for a predictable, high-quality, and deeply satisfying audio experience.
Part 1: Decoding the Driver - Understanding Key Thiele/Small Parameters
Before a single piece of wood is cut, the journey of designing a high-performance speaker enclosure begins with understanding its most critical component: the driver. A speaker driver is not just a cone that moves; it is a complex electromechanical motor with a unique set of characteristics. These characteristics are quantified by a set of specifications known as Thiele/Small (T/S) parameters, which are the essential ingredients for our design recipe.
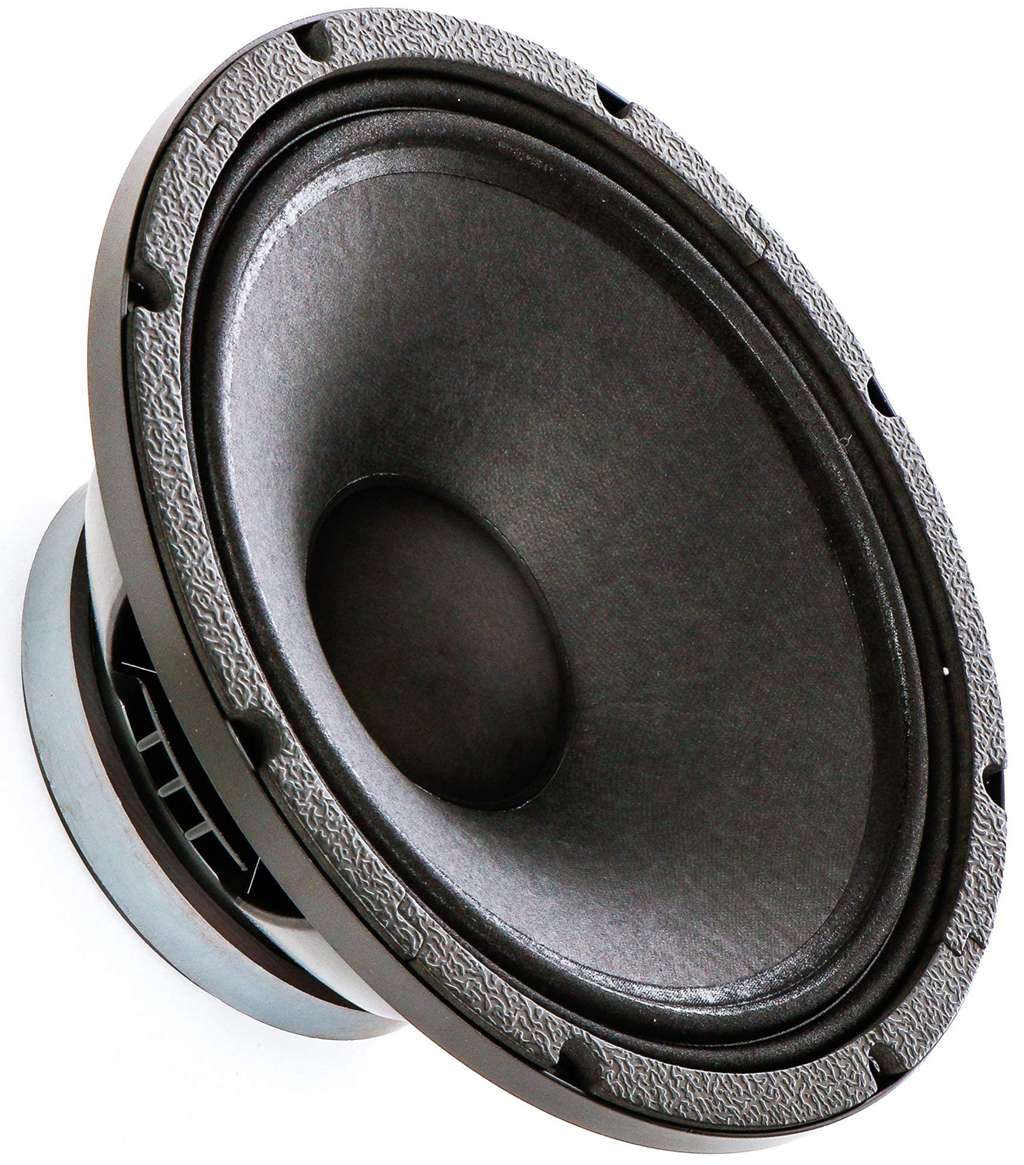
A raw woofer speaker driver, the fundamental component whose Thiele/Small parameters dictate enclosure design
While there are dozens of T/S parameters, for designing a sealed enclosure, we only need to focus on a critical few. These parameters describe the driver's mass, suspension stiffness, and motor strength, which together determine its acoustic output.
The "Big Three" for Sealed Enclosures
To design a sealed enclosure, you must intimately understand three primary T/S parameters provided by the driver manufacturer. These form the foundation of all our calculations.
Fs (Free Air Resonance): This is the natural frequency at which the driver's moving parts (the cone, voice coil, and suspension) vibrate when suspended in free air with no enclosure. Measured in Hertz (Hz), Fs is the point where the driver moves most efficiently with the least resistance. As a general rule, a lower Fs suggests the driver has better potential for deep bass reproduction. For example, a subwoofer with an Fs of 25 Hz will typically be able to play lower notes than one with an Fs of 40 Hz. It represents the practical low-frequency limit of the driver itself.
Qts (Total Q): Qts, or Total Quality Factor, is a unitless measurement that describes the driver's combined damping characteristics at its resonant frequency (Fs). It is a composite value derived from the driver's mechanical damping (Qms) and electrical damping (Qes).
Qms represents the mechanical control from the speaker's suspension system—the flexible surround and the spider—which act like shock absorbers.
Qes represents the electrical control from the motor system—the voice coil and magnet. As the coil moves through the magnetic field, it generates a counter-electromotive force (back EMF) that opposes the motion, providing electrical damping.
Vas (Equivalent Compliance Volume): This parameter can be tricky to grasp, but it's crucial. Vas represents a volume of air that has the same stiffness (compliance) as the driver's own mechanical suspension. It is measured in liters or cubic feet and describes the volume of air that, when compressed, exerts the same force as the driver's suspension (Cms). A driver with a very stiff suspension will have a low Vas, while a driver with a very loose, compliant suspension will have a high Vas. This parameter is essential because it helps determine the ideal enclosure size; typically, drivers with a lower Vas are better suited for smaller enclosures.
A Quick Check: The Efficiency Bandwidth Product (EBP)
Before committing to a sealed design, a quick calculation can confirm if your chosen driver is truly a good candidate. The Efficiency Bandwidth Product (EBP) provides a strong indication of the type of enclosure a driver is best suited for. The formula is simple:
EBP = Fs / Qes
Once you calculate the EBP, you can apply a widely accepted rule of thumb:
EBP between 50 and 100: The driver is flexible and can work well in either a sealed or a ported enclosure. The final choice depends on the design goals (e.g., tight bass vs. maximum output).
By understanding these fundamental parameters—Fs, Qts, and Vas—and performing a quick EBP check, you have all the necessary information to move from theory to practice. You are now ready to use these ingredients to design the heart of your speaker system: the enclosure itself.
Part 2: The Blueprint - Calculating Your Enclosure Volume
With a firm grasp of the driver's key parameters, we can now transition to the most critical phase of the design process: determining the physical volume of the enclosure. This is where science meets intent. The size of the box is not arbitrary; it is precisely calculated to achieve a specific acoustic outcome. The central goal is to manipulate the driver's performance to match our desired sound character, a character defined by a single, crucial parameter: Qtc.
Step 1: Defining Your Goal - Choosing a Target Qtc
If Qts is the driver's inherent Q factor in free air, then Qtc is the total Q of the driver *after* it has been installed in a sealed enclosure. The 'c' stands for "closed box." When a driver is placed in an airtight box, the trapped air acts as an additional spring, stiffening the overall suspension. This pneumatic damping from the air inside the box contributes to the total damping of the system. As the box volume decreases, the "air spring" becomes stiffer, and the Qtc value increases. Therefore, by choosing a specific box volume, we are effectively choosing a target Qtc.
Qtc denotes the enclosure's ability to control the driver's response at resonance and is the single most important design decision you will make, as it directly dictates the bass performance, including frequency response, roll-off characteristics, and transient accuracy. The choice of Qtc is a balance between objective flatness and subjective preference.
The Spectrum of Sound: Visualizing Qtc
The relationship between Qtc and frequency response is best understood visually. The chart below illustrates how a sealed system's low-frequency output changes with different Qtc values. All curves eventually converge at higher frequencies, but their behavior in the critical bass region is dramatically different.
Here is a breakdown of what each Qtc value means for the sound you will hear:
Step 2: The Magic Formula - Calculating Net Volume (Vc)
Once you have chosen your target Qtc, you can calculate the required net internal volume of your enclosure (Vc) using a cornerstone formula of sealed box design. This formula directly links the driver's parameters to your design goal.
Vc = Vas / [ (Qtc / Qts)² - 1 ]
Let's break down the components:
Vc: The Net Internal Volume of the enclosure you are solving for (in the same units as Vas).
Vas: The Equivalent Compliance Volume of your driver (from the spec sheet).
Qtc: Your chosen target Q for the system (e.g., 0.707).
Qts: The Total Q of your driver (from the spec sheet).
Practical Application: A Worked Example
Let's design an enclosure for a hypothetical 6.5" mid-woofer with the following Thiele/Small parameters, which are similar to those found in some real-world drivers used in DIY projects :
Vas: 49 liters
Qts: 0.26
Fs: 30 Hz
Our goal is a maximally flat response, so we will choose a target Qtc of 0.707.
The calculation shows that to achieve our target Qtc of 0.707 with this specific driver, we need a sealed enclosure with a net internal volume of approximately 7.66 liters. While understanding this formula is empowering, for convenience, many builders use online calculators or dedicated software. Programs like BassBox Pro or free tools like WinISD can perform these calculations instantly and provide detailed graphs, but they are all built upon this fundamental mathematical relationship.
Step 3: From Net to Gross - Accounting for Real-World Volume
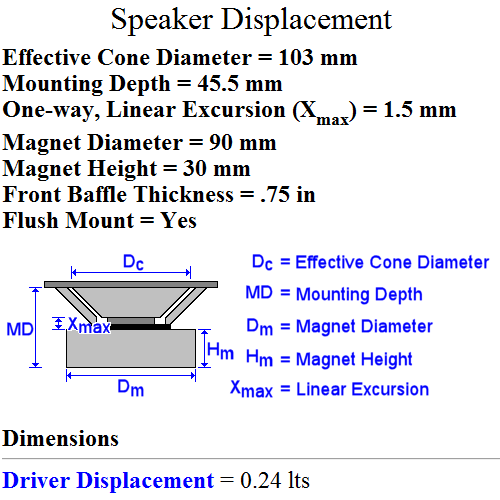
Bracing Displacement: Internal braces are crucial for rigidity but also occupy volume. You must estimate the volume of your bracing (length x width x height for each piece) and add it to the total. For a small box, this might be 0.2 to 0.5 liters.
Other Components: If the crossover network and speaker terminals are mounted inside the enclosure, their volume must also be accounted for.
The final calculation for the physical box you need to build is:
Gross Box Volume = 7.66 L + 0.6 L (driver) + 0.3 L (bracing) = 8.56 liters
This gross volume is the target you will use to determine the final external dimensions (Height x Width x Depth) of your speaker box, taking into account the thickness of the material you will use for construction.
Part 3: The Finishing Touch - The Art and Science of Damping
Once the enclosure volume is calculated and the box is built, there is one final, crucial step to refine its performance: the addition of internal damping material. This is often referred to as "stuffing" or "filling" the enclosure. While it may seem like a simple act of adding fluffy material, damping is a nuanced process that serves multiple acoustic purposes, transforming a good enclosure into a great one by controlling unwanted resonances and subtly altering the box's acoustic properties.
Why Add Stuffing to a Box?
The addition of damping material like polyfill, fiberglass, or wool inside a sealed enclosure has two primary and significant effects on the sound.
1. Taming Internal Reflections and Standing Waves
The primary and most intuitive goal of damping is to absorb sound energy inside the box. When the driver moves, it radiates sound not only forward into the room but also backward into the enclosure. These back waves bounce off the internal panels. Without damping, these reflections can travel back towards the speaker cone and pass through it, coloring the sound that reaches the listener. This can create audible resonance, a "boxy" or "hollow" coloration, and degrade the overall clarity, especially in the midrange frequencies. Damping material placed on the walls and within the volume of the enclosure effectively absorbs this unwanted energy, particularly at mid and high frequencies, ensuring that the sound you hear is predominantly the direct radiation from the front of the driver.
An empty box operates under **adiabatic** conditions (no heat transfer). When the air is compressed quickly, its temperature rises, increasing its pressure and stiffness.
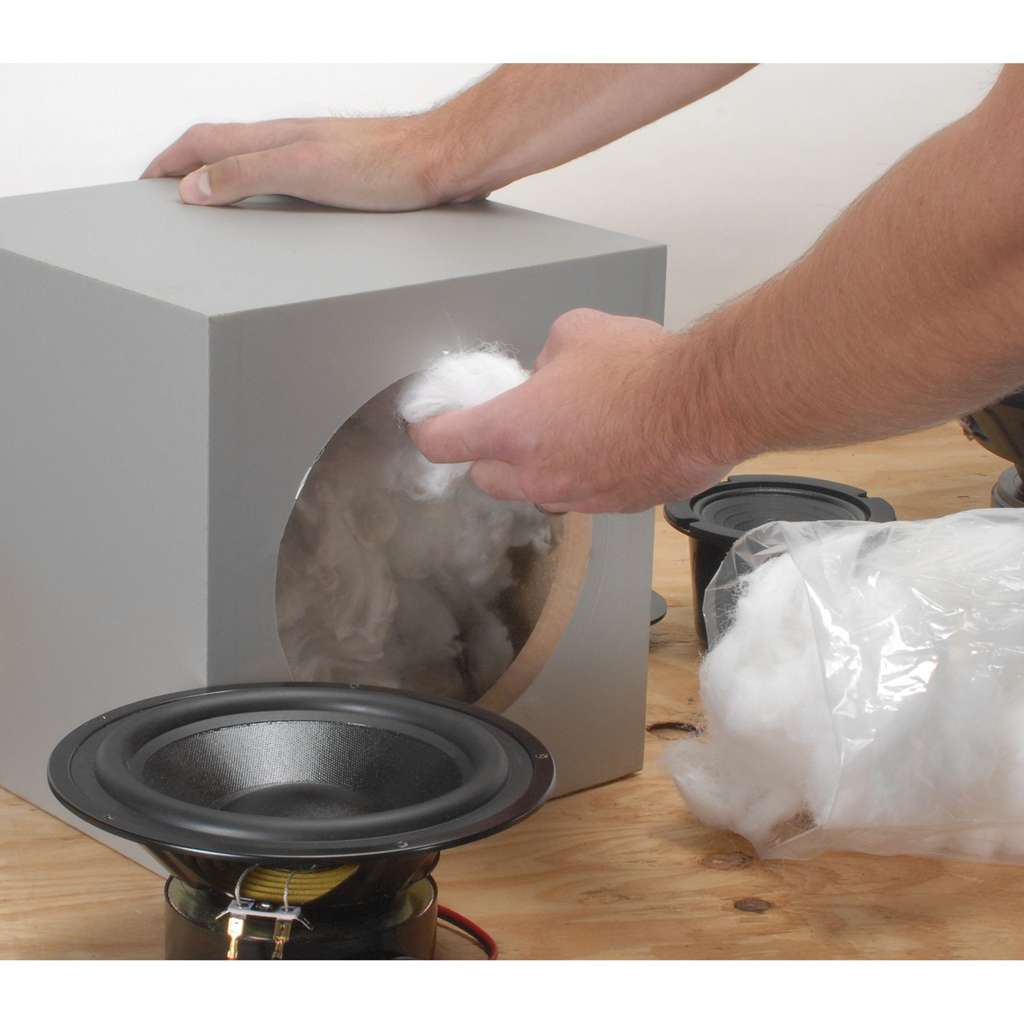
Acoustic damping material, such as polyester fiberfill, is essential for controlling internal reflections and increasing the apparent volume of the enclosure
Choosing Your Damping Material
Several materials are commonly used for damping, each with its own pros and cons.
Polyfill (Polyester Fiberfill): This is the most common choice for DIY builders. It is inexpensive, widely available (as pillow or quilt stuffing), safe, and easy to handle. It is very effective and provides a great balance of performance and convenience.
Natural Wools and Cottons: Materials like long-fiber wool or dense cotton batting are also excellent acoustic dampers. Some high-end manufacturers use materials like sheep wool. They can be very effective but are often significantly more expensive than polyfill or fiberglass.
How Much is Too Much?
Finding the right amount of damping is a balancing act. There are risks associated with using both too little and too much material.
The Risk of Under-damping: Using too little material will fail to adequately control internal reflections, which can lead to a resonant, "hollow," or "boxy" sound signature. The benefits of increased apparent volume will also be minimal.
Part 4: Bringing It to Life - Construction Best Practices
With the design finalized, the calculations complete, and an understanding of damping in hand, it's time to turn the blueprint into a physical reality. The quality of construction is just as important as the accuracy of the design. A poorly built box can undermine even the most perfect calculations, introducing rattles, resonances, and leaks that degrade sound quality. Adhering to a few key best practices will ensure your enclosure is as solid and acoustically inert as possible.
Material Matters
The choice of material for your enclosure has a significant impact on its acoustic performance. The ideal material is dense, stiff, and well-damped, meaning it resists vibration and does not have its own strong resonant character.
Thickness: For most bookshelf speakers and small subwoofers, a thickness of 3/4" (or 18mm) is the standard recommendation. For larger enclosures or high-power subwoofers that will generate immense internal pressure, increasing the thickness to 1" (25mm) or even using double-thick baffles (the front panel where the driver is mounted) is advisable.
Two Golden Rules for Sealed Enclosures
If you remember nothing else about construction, let it be these two principles. They are the foundation of a high-performance sealed enclosure.
1. Rigidity is King
The enclosure should be an immovable, silent partner to the driver. Any vibration in the cabinet walls is, by definition, a form of distortion. A vibrating panel becomes a secondary, uncontrolled sound source that muddies the output of the driver. Internal bracing is the most effective way to increase the rigidity of an enclosure without dramatically increasing its weight or thickness. A well-braced 3/4" MDF box will almost always outperform a thicker, unbraced box. Braces should connect opposite panels (e.g., side-to-side, top-to-bottom) to counteract the flexing forces. "Window" braces, which are panels with large cutouts, are particularly effective as they add stiffness in multiple directions while minimally impacting airflow and internal volume.
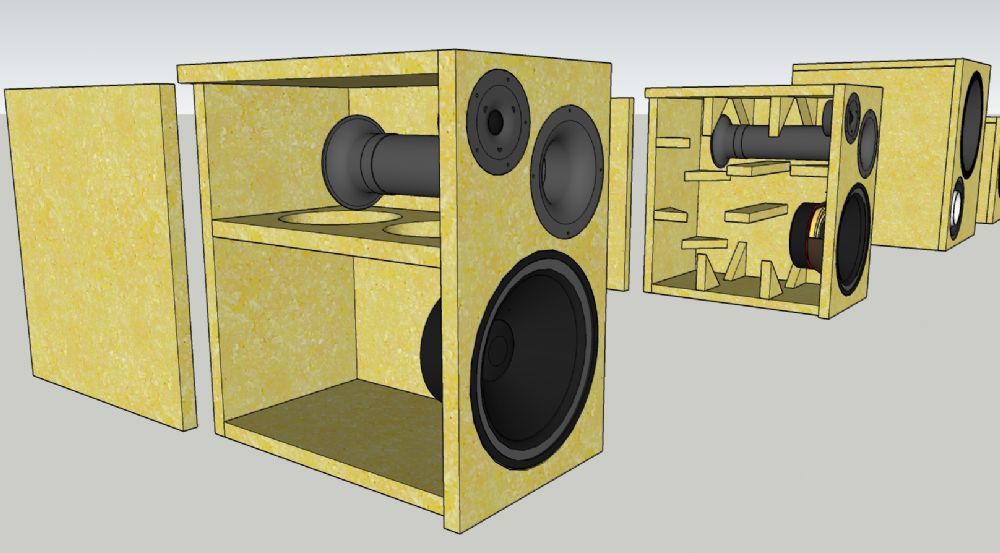
A 3D rendering showing the intricate internal bracing system of a speaker cabinet, crucial for ensuring rigidity and minimizing panel vibration
2. It MUST Be Airtight
This rule is non-negotiable for a sealed enclosure. The entire acoustic principle of the design relies on the trapped volume of air acting as a perfect spring. Any leak, no matter how small, will compromise the design. A leak turns your carefully calculated acoustic suspension system into a poorly designed, uncontrolled ported box, often resulting in audible whistling or "chuffing" noises and a complete loss of the tight, controlled bass you worked to achieve. To ensure an airtight seal:
Use a high-quality wood glue on all joints during assembly.
Ensure speaker terminals are sealed. Use terminals with a gasket or apply a sealant around them.
Mount the driver using a foam or rubber gasket between its frame and the baffle to create a perfect seal.
Final Assembly
The construction process typically follows a logical sequence. First, cut all panels to their precise dimensions—remember the old adage, "measure twice, cut once."; Assemble the box panel by panel, using wood glue and clamps to ensure tight joints. Screws can be used for additional strength but are not a substitute for good glue joints. Once the main box is assembled and the glue is dry, apply the internal sealant. Install the damping material and the speaker wire terminals. Finally, solder the wires to the driver, place the driver gasket on the baffle, and screw the driver securely into place, being careful not to overtighten and strip the holes or damage the driver's frame.
Conclusion: Your First Step into High-Fidelity Sound
The journey from a set of raw specifications to a finished, high-performing loudspeaker is one of the most gratifying experiences in the world of audio. We have navigated the entire process, demystifying the science that governs the heart of any great speaker system. By following this guide, you have learned to translate the abstract language of Thiele/Small parameters into a tangible, predictable, and exceptional sonic result.
Let's recap the core stages of this journey:
Understand Your Driver: We started by decoding the essential T/S parameters—Fs, Qts, and Vas—which define the driver's fundamental acoustic DNA.
Choose Your Sound Goal: We established that the target Qtc is the most critical design choice, allowing you to dictate the final character of the bass, from "critically damped" accuracy (0.707) to "fun" warmth (0.8-1.0).
Calculate the Volume: Using a fundamental formula, we transformed these parameters and goals into a precise net internal volume (Vc), the acoustic space your driver needs to thrive.
Account for Reality: We adjusted the net volume to a gross volume by accounting for the physical displacement of the driver, bracing, and other components.
Refine with Damping: We explored the art of applying internal damping material to control reflections and increase the apparent acoustic volume, fine-tuning the sound to perfection.
Build with Precision: Finally, we emphasized the two golden rules of construction for a sealed enclosure: make it rigid and make it airtight.
The sealed enclosure, in its elegant simplicity, is the perfect teacher. It is forgiving of minor errors yet rewards precision and care with a sound quality that is pure, accurate, and deeply musical. It provides a natural, well-balanced bass sound that is suitable for critical listening and audiophile-grade systems. While the process is rooted in science and mathematics, the final result is an emotional one—the pride and joy of listening to music through a system you built with your own hands.
Now, the blueprint is yours. Find a driver that speaks to you, gather your tools, and begin the process. Embrace the challenge, enjoy the learning, and prepare to experience your favorite music in a way you never thought possible—through a speaker that is uniquely, wonderfully, and perfectly yours.
Reference
[1]
Sealed vs. Ported Enclosures: A Comparative Analysis